
Tuesday, November 27, 2012
Hello?
Hi there! Sorry I've been so quiet over here. We had a wonderful Thanksgiving, the food was great and the company was even better. Now I'm just sort of enjoying the "calm before the storm". I'm filling up my advent calendar with fun activities to do with the family, working on a few little projects, wrapping gifts!, and reading a book.
December is going to be busy and I'm excited to get started celebrating Christmas with my little guys. They may be two now but in ways this feels like it is their first Christmas; they are able to participate so much more now and they recognize Santa!
I have lots of fun things planned to do with them, and lots of things to share with you. See you very soon (like next week, lol).
Tuesday, November 20, 2012
Play School - Thanksgiving
Are you as busy as I am??? I should be making a cheesecake right now but I figure I'll relax for a few minutes and write this post instead. :) It has been a busy week for us what with cooking for 13 people and all, but I am happy to say I did make some time for Play School, even if my children didn't seem to appreciate all my cute craft ideas for the week....
Books:
I had four Thanksgiving books out for the kids to read this week.

I really like Thanks for Thanksgiving by Julie Markes but the boys both seemed to choose T is for Turkey as their favorite. They are just really into the alphabet right now.
Activities:
I made up this button turkey for the boys to play with this week.

It was really quick and easy. I just used some felt and a few colorful buttons I picked up at the craft store. I used fabric glue to attach the face and head to the turkey and hand sewed the buttons on. I then glued a second brown circle on the back to keep the (messy) button stitching away from prying fingers.
I cut a small slit in each of the feathers so they could be buttoned on by the boys....in theory.

The boys really loved this turkey and bring it to me several times a day but neither can button the feathers on yet. They do great with the color matching aspect though and are very accurate identifying their colors now.
I got my inspiration for this here and here.
The other activity we "attempted" to do were M&M turkeys. I found this great printable (4 turkeys to a page) and colored them in a bit myself since I wanted the kids to focus on the candy placing aspect of the activity. I gave each boy a fun size bag of M&M's left over from Halloween and showed them how to place one candy on each circle. Great idea for working on fine motor skills but they really just wanted to eat the candy. sigh. How can I blame them? M&M's are just too delicious.


Crafts:
We really failed in the craft department this week too, lol. First I attempted the classic hand print turkeys. After watching Grammy demo getting her hand painted and putting it on the paper Aaron was willing to be painted but he didn't want to put his hand down! So he just smeared it all around. Sigh again.
Alex was not going to let me paint his hand so he went to town with a brush instead.


The next day I figured I'd take one more stab at Turkey making. This time I decorated two pine cones with some googly eyes and scraps of felt and tried to get the boys to let me trace their hands on construction paper for the feathers. Aaron agreed but only after being bribed with more M&M's. Alex wouldn't even do it for candy! SIGH.
I made two copies of Aaron's hand just to finish my poor naked second turkey. They are pretty cute though.

As usual, everything didn't go as intended... BUT we had fun. And I am very grateful to have such fun little boys.
Have a very Happy Thanksgiving everyone!!!
Thursday, November 15, 2012
DIY Advent Calendar
One of the projects I was most looking forward to doing this holiday season was making an advent calendar. I really love the idea of an activity advent calendar. Instead of getting a piece of candy each day leading up to Christmas, you get a slip of paper with a holiday activity idea for the family to do together. I think it will be fun celebrating Christmas a little bit each day.
I looked at advent calendars all over the internet for inspiration and ended up combining a few different ideas to come up with one of my own that was easy to do, used mostly materials I already had (so it didn't cost a fortune to make) and that I think looks great. I'm really happy with how it turned out and I cant wait until December to start using it.

DIY Advent Calendar
My calendar is made up of origami paper boxes. There are lots of ways to adapt this to use things you already have around the house so I encourage you to adjust as necessary. Not every project needs to cost a bundle! For the purpose of a tutorial, though, here's what I used.
Materials:
Holiday scrapbook paper (13) 12x12 sheets
1 sheet white card stock
1 inch circle punch
Glue dots
A gold marker
large framed corkboard
Thumbtacks
The first step (and the longest) is to make 25 origami boxes. This is actually really easy to do. I had never made a box from paper before but I found this great video tutorial and had no trouble following along. I was a pro in no time. To begin, cut each sheet of scrapbook paper into (4) 6 inch squares (this is enough for 26 boxes, you really only need 25).

Start with one square, pattern side down, and fold it in half.

Unfold, fold in half the other way.

Unfold, fold each corner in to the center using the creases you made already for guidance.


Do not unfold, Fold the bottom side into the center. Fold the top half into the center. Unfold.

Repeat on the other side.

Unfold then refold two opposite corners into the center then fold the top and bottom toward the middle and flatten the ends like shown.


Now turn the paper lengthwise and bring those same sides up.

This part is hard to explain but now you basically push the ends in with your index fingers...the paper will collapse in on the creases you've made and you can fold the far end over and into the bottom of your box.


Voila! The bottom is done!

The top is made the exact same way except when you are folding the bottom and top toward the center (after the points have been folding in) you want to leave a small gap. And again when you repeat on the other side. Like this...

This will make the top half just big enough to close down over the bottom. Finished boxes!

Once you have them all done, arrange them on the cork board (or whatever you are mounting them to) so that you can make sure you like how your patterns are distributed.
Now use the paper punch to create 25 small circles. Use the gold pen to write in your numbers. Affix the numbers to the boxes using the glue dots.
To attach the finished boxes to the corkboard I just put a thumbtack through the bottom part of the box and then put the lid on over top.

That's it! Admire your handywork!


I looked at advent calendars all over the internet for inspiration and ended up combining a few different ideas to come up with one of my own that was easy to do, used mostly materials I already had (so it didn't cost a fortune to make) and that I think looks great. I'm really happy with how it turned out and I cant wait until December to start using it.

My calendar is made up of origami paper boxes. There are lots of ways to adapt this to use things you already have around the house so I encourage you to adjust as necessary. Not every project needs to cost a bundle! For the purpose of a tutorial, though, here's what I used.
Materials:
Holiday scrapbook paper (13) 12x12 sheets
1 sheet white card stock
1 inch circle punch
Glue dots
A gold marker
large framed corkboard
Thumbtacks
The first step (and the longest) is to make 25 origami boxes. This is actually really easy to do. I had never made a box from paper before but I found this great video tutorial and had no trouble following along. I was a pro in no time. To begin, cut each sheet of scrapbook paper into (4) 6 inch squares (this is enough for 26 boxes, you really only need 25).

Start with one square, pattern side down, and fold it in half.

Unfold, fold in half the other way.

Unfold, fold each corner in to the center using the creases you made already for guidance.


Do not unfold, Fold the bottom side into the center. Fold the top half into the center. Unfold.

Repeat on the other side.

Unfold then refold two opposite corners into the center then fold the top and bottom toward the middle and flatten the ends like shown.


Now turn the paper lengthwise and bring those same sides up.

This part is hard to explain but now you basically push the ends in with your index fingers...the paper will collapse in on the creases you've made and you can fold the far end over and into the bottom of your box.


Voila! The bottom is done!

The top is made the exact same way except when you are folding the bottom and top toward the center (after the points have been folding in) you want to leave a small gap. And again when you repeat on the other side. Like this...

This will make the top half just big enough to close down over the bottom. Finished boxes!

Once you have them all done, arrange them on the cork board (or whatever you are mounting them to) so that you can make sure you like how your patterns are distributed.
Now use the paper punch to create 25 small circles. Use the gold pen to write in your numbers. Affix the numbers to the boxes using the glue dots.
To attach the finished boxes to the corkboard I just put a thumbtack through the bottom part of the box and then put the lid on over top.

That's it! Admire your handywork!

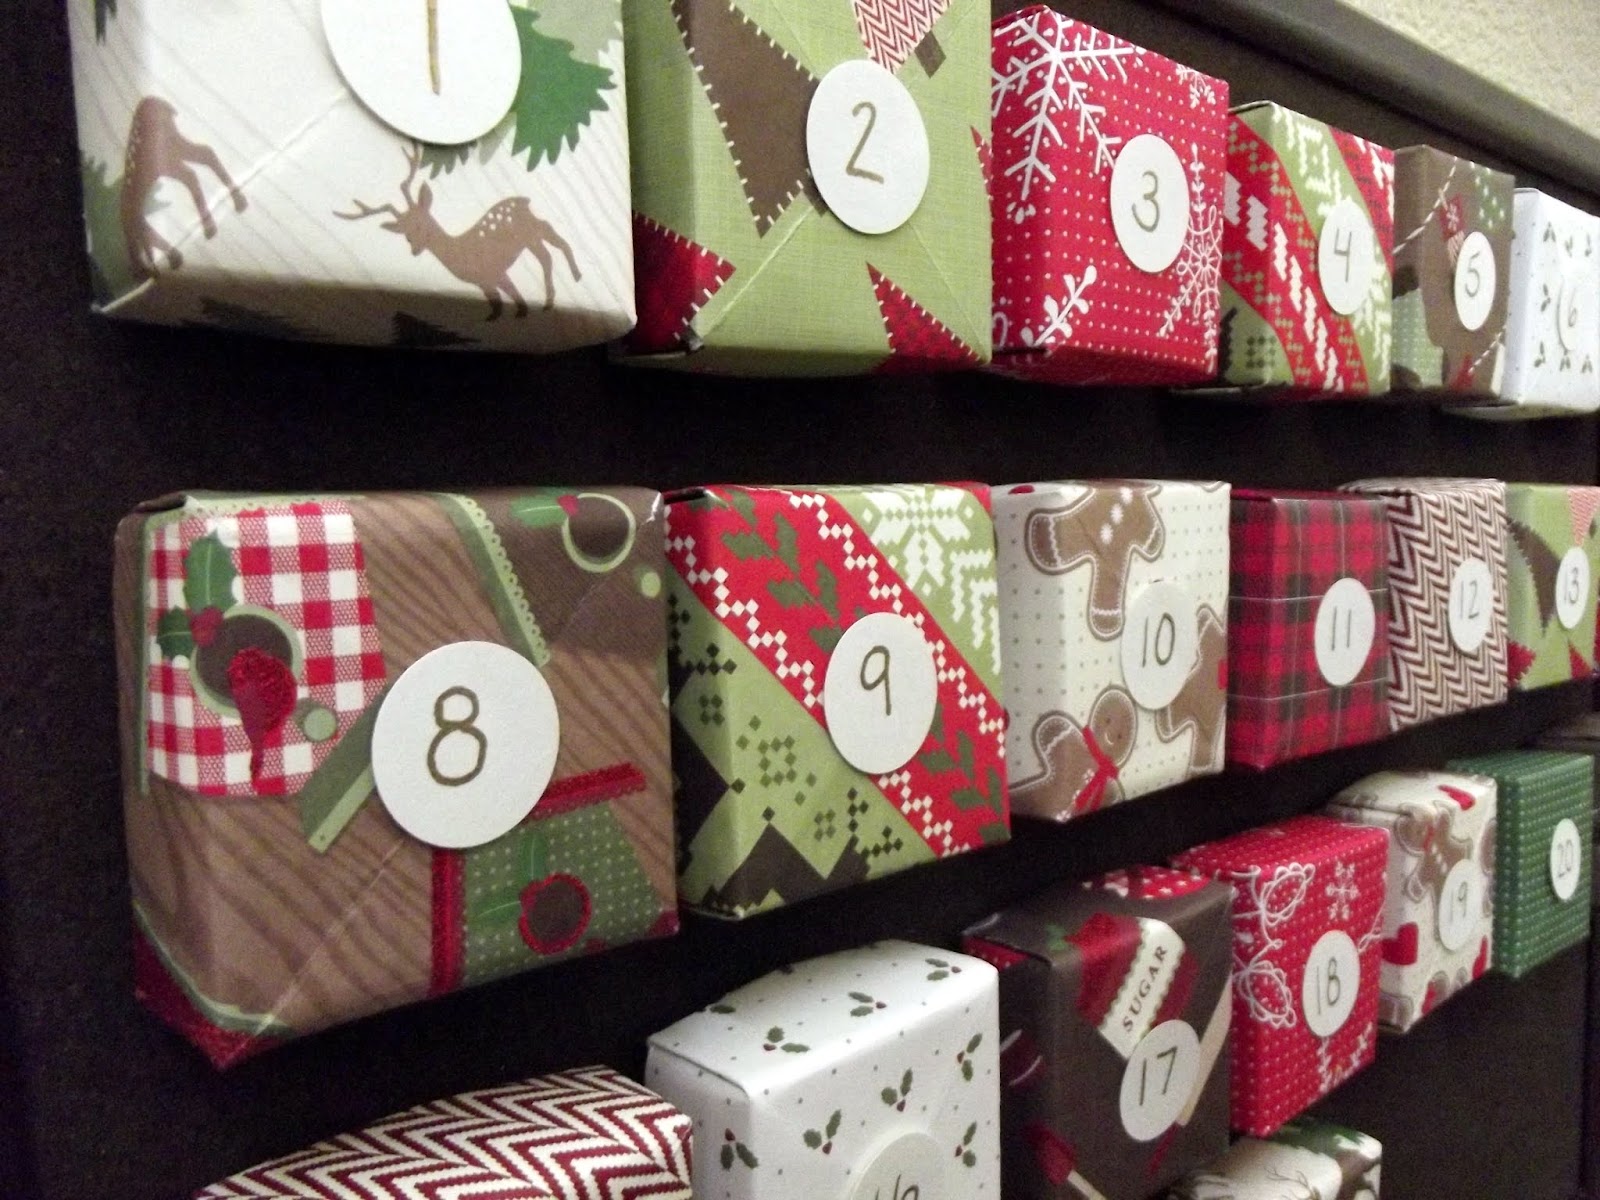
Add a ribbon or some other embellishment if desired and fill with candy or slips of paper with family activities written on them. I'm going to include things like "decorate the Christmas tree" "open 1 present" (Christmas PJs) and "watch a Christmas movie". Should be fun. :)
So there you have it! I hope you like it. The pictures aren't the best (as usual!) but I really like the finished product. The patterns are fun and Christmasy but still simple and pretty.
Now back to all that Thanksgiving prep I have left to do.....
This post is linked to:
Tuesday, November 13, 2012
Thanksgiving Menu
It is really crazy around here these days. We've added a new member to the household (my father-in-law has joined my mother-in-law out here) so we are getting settled in and readjusting to having a family of 6! The kids love having their grandparents here and Mr Pears and I love having the extra hands and a little bit of free babysitting services. ;) Being able to run errands during naptime or have dinner out with the Mr after the kids are in bed is sooo nice!
Anyway, that, on top of Thanksgiving next week...yikes! Lots to do. I thought I'd post what our menu looks like so far along with a few recipe links. Please feel free to comment if you have any great Thanksgiving dishes to share, I'm always looking for new ideas!
We are serving 11 adults and 2 children this year and this is what we've got planned:
Turkey (duh!) we will be using this brine
along with an additional turkey breast
(We'll be buying them organic, the treatment of turkeys in this country is abominable so that is important to us)
Gravy, of course!....but I don't have a recipe yet...hmmm
Cranberry Relish - a guest is bringing it!
Bread.....uh oh, I need to figure out what kind of bread we are going to make
2 Vegetable sides to be brought by guests
Dressing/Stuffing to be brought by a guest
Mashed Potatoes, this is my favorite recipe...simple and easy and delicious.
Sweet Potatoes, recipe from Pioneer Woman, these are sweet and amazing but I am going to half the topping this time because I thought it was a bit too sweet for my taste. If you try the recipe I would make all of the topping and just put on what you think looks good to you.
Pumpkin Cheesecake, here is a post on that
Old fashioned Gingerbread, I made the one out of Thomas Keller's new cookbook Bouchon Bakery and it was awesome! I'll probably get around to writing a post on that one soon.
And I think that is it....am I missing something!? I'm really happy we are having guests this year and I'm glad they are all bringing something to share. I think it will be fun and I am looking forward to seeing what kinds of great dishes they bring. Because sometimes the sides are the best part, don't you think?
Friday, November 9, 2012
Pumpkin Pie Cheesecake
I can't believe that Thanksgiving is in less than 2 weeks! I think it is coming on me fast because for the first time I'm having a pretty big group over here for the big day. I'm looking forward to celebrating with friends and family and eating lots of holiday favorites.
My menu is in the works already of course. I am doing my best to follow the cooking rule I almost never follow: "Thou shall not try out a new recipe on a crowd". With that in mind I decided to try this Pumpkin Cheesecake last week to make sure it was T-Day worthy. And believe me, it is.
I really love pumpkin and pumpkin pie is great but I had my heart set on making a "different" pumpkin dessert for Thanksgiving. I realize cheesecake isn't all that radical but it is a nice twist on the classic pumpkin pie. The cheesecake has plenty of pumpkin flavor and it is fairly light and fluffy. It is a cheesecake you can actually eat more than a bite of....definitely more than a few bites! :) The crust is made from gingersnap cookies and it was so good Mr Pears suggested I make it a bit thicker next time, so I've altered the recipe to reflect that.

Pumpkin Cheesecake, adapted from Gina Neely
Crust
45 gingersnap cookies (I used Mi-Del gingersnaps from Whole Foods, they are about 1.5 inches, round)
6 tablespoons butter, melted
Filling
4 (8oz ) package cream cheese, room temperature
1 3/4 cups sugar
1 (15oz) can pumpkin puree
5 large eggs
1 1/2 teaspoons ground cinnamon
1/2 teaspoon ground ginger
1/4 teaspoon grated nutmeg
1/4 teaspoon ground cloves
1/2 teaspoon salt
1 tablespoon vanilla extract
2 tablespoons all-purpose flour
Preheat the oven to 350F. To make the crust, finely grind the cookies in your food processor. In a small bowl mix them with the melted butter. Pour the crumbs into a 9 inch springform pan (3 inches deep) and then press them evenly into the bottom. Bake for 10 minutes. Remove and allow to cool while you make the filling.
First put a pot or tea kettle of water on the stove to boil. Next put the beat the cream cheese and sugar together in your mixer until it is fluffy, at least 2 minutes. Add the pumpkin and mix until fully incorporated, then add the eggs one by one mixing after each addition. Add in the spices and vanilla and mix. Lastly add the flour and mix a final time until everything is evenly combined.
Wrap aluminum foil around the bottom and sides of the cooled springform pan. I would suggest using two layers because you don't want the water to seep in. Pour the filling into the pan. Place the pan into a roasting pan and pour the hot water in around the cake. You want enough water so that water reaches about half way up the sides of the cake pan.
Transfer the roasting pan carefully into the oven and bake for 1 hour 20-30 minutes. Mine took the whole hour and a half. The cake should be set on top but a little jiggly when you shake it lightly.
Remove the cake from the water bath and set it on a wire rack to cool. When cooled, use a knife to loosen the sides and remove the springform pan. Refrigerate for at least 4 hours. (This is a great to make the day before!)
Serve with homemade whipped cream. I love my plain sweetened whipped cream but this time I'm going to add a dash of bourbon a la Emeril, yum!
My menu is in the works already of course. I am doing my best to follow the cooking rule I almost never follow: "Thou shall not try out a new recipe on a crowd". With that in mind I decided to try this Pumpkin Cheesecake last week to make sure it was T-Day worthy. And believe me, it is.
I really love pumpkin and pumpkin pie is great but I had my heart set on making a "different" pumpkin dessert for Thanksgiving. I realize cheesecake isn't all that radical but it is a nice twist on the classic pumpkin pie. The cheesecake has plenty of pumpkin flavor and it is fairly light and fluffy. It is a cheesecake you can actually eat more than a bite of....definitely more than a few bites! :) The crust is made from gingersnap cookies and it was so good Mr Pears suggested I make it a bit thicker next time, so I've altered the recipe to reflect that.

image from Food Network.com
Pumpkin Cheesecake, adapted from Gina Neely
Crust
45 gingersnap cookies (I used Mi-Del gingersnaps from Whole Foods, they are about 1.5 inches, round)
6 tablespoons butter, melted
Filling
4 (8oz ) package cream cheese, room temperature
1 3/4 cups sugar
1 (15oz) can pumpkin puree
5 large eggs
1 1/2 teaspoons ground cinnamon
1/2 teaspoon ground ginger
1/4 teaspoon grated nutmeg
1/4 teaspoon ground cloves
1/2 teaspoon salt
1 tablespoon vanilla extract
2 tablespoons all-purpose flour
Preheat the oven to 350F. To make the crust, finely grind the cookies in your food processor. In a small bowl mix them with the melted butter. Pour the crumbs into a 9 inch springform pan (3 inches deep) and then press them evenly into the bottom. Bake for 10 minutes. Remove and allow to cool while you make the filling.
First put a pot or tea kettle of water on the stove to boil. Next put the beat the cream cheese and sugar together in your mixer until it is fluffy, at least 2 minutes. Add the pumpkin and mix until fully incorporated, then add the eggs one by one mixing after each addition. Add in the spices and vanilla and mix. Lastly add the flour and mix a final time until everything is evenly combined.
Wrap aluminum foil around the bottom and sides of the cooled springform pan. I would suggest using two layers because you don't want the water to seep in. Pour the filling into the pan. Place the pan into a roasting pan and pour the hot water in around the cake. You want enough water so that water reaches about half way up the sides of the cake pan.
Transfer the roasting pan carefully into the oven and bake for 1 hour 20-30 minutes. Mine took the whole hour and a half. The cake should be set on top but a little jiggly when you shake it lightly.
Remove the cake from the water bath and set it on a wire rack to cool. When cooled, use a knife to loosen the sides and remove the springform pan. Refrigerate for at least 4 hours. (This is a great to make the day before!)
Serve with homemade whipped cream. I love my plain sweetened whipped cream but this time I'm going to add a dash of bourbon a la Emeril, yum!
Thursday, November 8, 2012
Play School - Farm
This has been a rough week; my little guys are sick again. I joined a fitness club with a kids' center so it seems we are on a great little routine that goes like this: one week go to the gym, next week home sick, repeat. Awesome. So far they've just had the typical sniffles and coughs and my guys are healthy little horses so we are going to try and tough it out. I really think going to the club is beneficial for all of us even if it means some days will be spent wiping snotty noses and watching too much TV.
On that note....we did focus on Farms for Play School this week. Since the guys were sick, particularly Monday, I decided to just let them explore their Play School box at their own pace instead of trying anything more organized.
Here's what is in the box this week.
Books:
Rock-a-Bye Farm by Diane Johnston Hamm
123 by Tucker Slingsby (part of a set)
Barnyard Dance by Sandra Boynton
First Book of Baby Farm Animals by Baby Einstein
Horseplay! by Karma Wilson
Fergus to the Rescue by Tony Maddox

Lots of books this week! The boys are really into books right now. Alex always has been, but for the last week or so Aaron has shown more interest than usual. Both boys love pointing to all of the pictures in the Baby Einstein animals book, it was a huge hit (from the library). Barnyard Dance is always a favorite around here along with cute little Fergus. 123 is also very popular right now; Alex is suddenly showing interest in numbers so he really likes any counting books these days.
Activities:
I printed these great farm animal cards from 1+1+1=1 and glued each to a piece of cardstock to make them more sturdy. I put them into a zip lock baggy inside our school box. When the boys found the cards we laid them all out on the floor and I asked them to find me the cows, sheep, etc.

I really love this printable (and the blog behind it!), along with the animals shown it also included real animal pictures so you could do some more complex matching. It would make for a great memory game too. Lots of possibilities with this one.
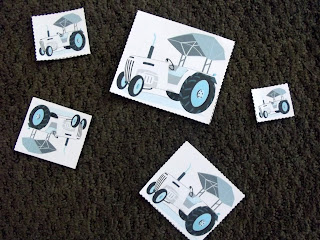
Another thing included in the printable was these tractors. When the boys noticed these I asked them to find the biggest and so forth and was shocked that they got them all right on the first try! This was our first time doing any focused size sequencing so I was really impressed. (Note: I think the tractors are actually red in the printable but my printer ink was running out!)
Other activities on hand this week are a farm puzzle and the piggy bank. The boys are really good at puzzles now. I am hoping to get some more for Christmas. The piggy bank was a simple yet engaging activity for the boys. They really enjoy fitting their coins into the slot and then shaking the piggy to get them all back. (Our piggy bank is ceramic so I supervised this activity and I'm keeping the piggy out of reach until requested. It has been requested several times this week, it truly is the little things that toddlers love)


Also in the box:
2 small stuffed animals (horse and dog) for pretend play and various flashcards with farm related items including vegetables and eggs... farms aren't just about animals! :)

That is about it for this week. The boys have played with their school box more than I expected this week and I'm happy to report that everyone is looking and sounding much better already today. We'll be back to the gym next week. Maybe it will be our lucky week and no one will bring home any germs!
This post is linked to Artsy Play Wednesday
On that note....we did focus on Farms for Play School this week. Since the guys were sick, particularly Monday, I decided to just let them explore their Play School box at their own pace instead of trying anything more organized.
Here's what is in the box this week.
Books:
Rock-a-Bye Farm by Diane Johnston Hamm
123 by Tucker Slingsby (part of a set)
Barnyard Dance by Sandra Boynton
First Book of Baby Farm Animals by Baby Einstein
Horseplay! by Karma Wilson
Fergus to the Rescue by Tony Maddox

Lots of books this week! The boys are really into books right now. Alex always has been, but for the last week or so Aaron has shown more interest than usual. Both boys love pointing to all of the pictures in the Baby Einstein animals book, it was a huge hit (from the library). Barnyard Dance is always a favorite around here along with cute little Fergus. 123 is also very popular right now; Alex is suddenly showing interest in numbers so he really likes any counting books these days.
Activities:
I printed these great farm animal cards from 1+1+1=1 and glued each to a piece of cardstock to make them more sturdy. I put them into a zip lock baggy inside our school box. When the boys found the cards we laid them all out on the floor and I asked them to find me the cows, sheep, etc.

I really love this printable (and the blog behind it!), along with the animals shown it also included real animal pictures so you could do some more complex matching. It would make for a great memory game too. Lots of possibilities with this one.
Another thing included in the printable was these tractors. When the boys noticed these I asked them to find the biggest and so forth and was shocked that they got them all right on the first try! This was our first time doing any focused size sequencing so I was really impressed. (Note: I think the tractors are actually red in the printable but my printer ink was running out!)

Other activities on hand this week are a farm puzzle and the piggy bank. The boys are really good at puzzles now. I am hoping to get some more for Christmas. The piggy bank was a simple yet engaging activity for the boys. They really enjoy fitting their coins into the slot and then shaking the piggy to get them all back. (Our piggy bank is ceramic so I supervised this activity and I'm keeping the piggy out of reach until requested. It has been requested several times this week, it truly is the little things that toddlers love)


Also in the box:
2 small stuffed animals (horse and dog) for pretend play and various flashcards with farm related items including vegetables and eggs... farms aren't just about animals! :)

That is about it for this week. The boys have played with their school box more than I expected this week and I'm happy to report that everyone is looking and sounding much better already today. We'll be back to the gym next week. Maybe it will be our lucky week and no one will bring home any germs!
This post is linked to Artsy Play Wednesday
Monday, November 5, 2012
Brining your Bird
Thanks to kiddo sicky germs I'm going to repost this Brining tutorial rather than share with you the great Pumpkin Cheesecake recipe I made this weekend. (You'll just have to stay tuned for that one cause it's delicious.)
A simple brine is our super special secret for a perfect Thanksgiving turkey. And it's time to start thinking about that Turkey! Though from the state of malls and big box stores these days it appears we are skipping straight to Christmas....but enough on that.
If you still fear the dried out turkey, this one is for you. Happy Thanksgiving Planning!
I made my first brine when I was doing my first Thanksgiving turkey. My motto is obviously, go big or go home. Luckily it was a huge success. The brine gave the turkey so much flavor and it was so juicy. A friend who shared the holiday with us always talks about how much turkey he ate that day. It was just that good. With the success of the turkey, I started to think about what else I could brine. Like those frozen pork chops that we purchased in bulk from the local warehouse club that we had been less than enthusiastic about cooking. I brined that pork for a couple of hours... and MAGIC! Brining really is super easy and an almost fool-proof way to come away with some pretty amazing, juicy, meat.
A simple brine is our super special secret for a perfect Thanksgiving turkey. And it's time to start thinking about that Turkey! Though from the state of malls and big box stores these days it appears we are skipping straight to Christmas....but enough on that.
If you still fear the dried out turkey, this one is for you. Happy Thanksgiving Planning!
 |
| A Simple Brine makes a Simply Delicious Turkey! |
I made my first brine when I was doing my first Thanksgiving turkey. My motto is obviously, go big or go home. Luckily it was a huge success. The brine gave the turkey so much flavor and it was so juicy. A friend who shared the holiday with us always talks about how much turkey he ate that day. It was just that good. With the success of the turkey, I started to think about what else I could brine. Like those frozen pork chops that we purchased in bulk from the local warehouse club that we had been less than enthusiastic about cooking. I brined that pork for a couple of hours... and MAGIC! Brining really is super easy and an almost fool-proof way to come away with some pretty amazing, juicy, meat.
Water, Salt, Sweet. That’s all you really need. You can sub honey for the sugar if you want. Then add whatever spices you are in the mood for, or even some veggies. I like to add rosemary, sage and thyme. We grow those in the backyard so it is easy to snip off a couple of leaves and sprigs and add them in.
Basic Brine, adapted from Bouchon by Thomas Keller
1 gallon of water
1 cup of Kosher Salt
½ cup of brown sugar
1 cup of Kosher Salt
½ cup of brown sugar
4 sprigs Rosemary
6-12 Bay leaves
2 Tbsp. Peppercorns
1 bunch of Thyme
6-12 leaves of Sage
Put all ingredients in a large stock pot and bring to a boil. Let boil for just a minute and then turn off the heat and allow it to cool down.
Once it is cool, put your meat into the pot and put the pot into the refrigerator. A good rule of thumb is to let your meat sit in the brine for 1 hour per pound, if you go longer the meat may come out salty.
After you take the meat out of the brine, rinse it, pat it down and then cook it as you would normally. But remember, if you add herbs or other spices to your brine the meat will pick up these flavors, so there is no need to season as much as you usually would. Just a bit of salt and pepper should do.
Subscribe to:
Posts (Atom)